Motor Car History
Technical History of the Motor Car


1890s  1900s  1910s  1920s  1930s  1940s  1950s  1960s   1970s  1980s  1990s  2000s  2010s

Toggle Navigation
  • Home
  • Makes and models
  • Motor car History
  • Maintenance Guide
    • Engines By Make
    • Engine Components
    • Electrical & electronic
    • Gearbox & Drivetrain
    • Induction & Exhaust
    • Suspension Types
    • Tyres wheels Brakes
    • Vehicle Body types
  • Trivia
  • Register
  • *Top rated*
  • You are here:  
  • Motor Car
  • Maintenance Guide
  • Vehicle Body
  • Paint Adhesion Problems
Technical Guides

Vehicle Paint Adhesion
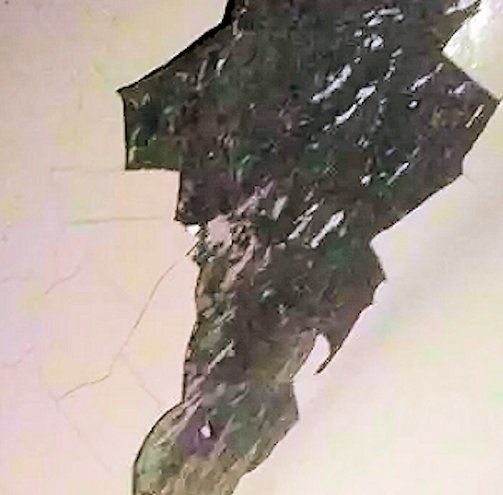
Vehicle Paint Adhesion help


This section covers poor paint adhesion prevention and causes, of peeling, flaking and poor adhesion when paint spraying Vehicle.

Guide


Note: The only fail safe repair method of repairing a paint job which shows signs of poor adhesion is to remove the old finish and repaint.

Cause

1 Presence of any foreign material on surface prior to painting, such as wax, grease, silicones, oil, water, rust, solder flux and soap. (These foreign substances may come from many sources including waxes and polishes, compounds, detergents, compressed airline, hands, petrol, reducers and atmosphere.)
2 Use of wrong primer for the metal.
3 Improper use of, or no use of, metal pretreatment and rust remover on steel, aluminium or fibreglass.
4 Use of cheap thinner, insufficient thinner, or too high air pressure for primer.
5 Recoating of primer—surfacer without allowing sufficient time for primer to dry.
6 Insufficient flatting of surface before painting.
7 Application of coating to surface which is too hot or too cold.
8 Films too thick.


Prevention

1 Before starting metal work, wash area thoroughly with metal pretreatment and rust remover.
2 Neutralize solder flux with ammonia or baking soda solution, followed by weak vinegar solution and water rinse.
3 Wet flat or dry flat old finish thoroughly. Dry sand metal area.
4 Wipe entire area with a wax and grease remover.
5 Use metal pretreatment and rust remover on bare metal.
6 Dry surface with clean rags or chamois,and compressed air.
7 Prime bare metal areas within 30 minutes to prevent start of rusting.
8 Paint material, surface, and room should be at relatively equal temperatures, preferably between 16 and 24 °c.
9 Follow directions as to type and amount of thinner and air pressure.

Related items
vehicle body repair | Vehicle Paint
  • Vehicle Body Previous 34 / 111 Next

Body Types

  • Vehicle Body TypesVehicle Body Types
    • Berlinetta
    • Bullnose
    • Dicky seat
    • Gull wing
    • high wheelers
    • Landaulet
    • Shooting Brake
    • Spider
    • superleggera
    • Targa
    • Torpedo
    • Tricar
    • Vignale

On Motor Car

  • Maintenance Guide
  • Makes and Models
  • Motor car History
  • Film & TV
  • Your Top Rated
  • Join here

log on

Log in to Motor car

  • Forgot your username?
  • Forgot your password?

Welcome To Motor Car

Help Guide

  • Engine
    • Manufacturers
    • Components
    • Cooling System
    • Cylinder
    • Fuel system
    • Ignition System
    • Starter motor
    • Turbo
    • Crankshaft
    • Piston
    • ECU related
    • Injection
  • Carburettor
    • Holley
    • Solex
    • SU
    • Weber
    • Zenith
    • Stromberg
  • Drivetrain
    • Clutch
    • Gearbox
    • Tyres
    • Wheels
    • Driving techniques
  • Suspension
  • Electrical
  • Vehicle Body
  • Brakes
  • Service Guides
  • Tools
  • cyclecar
  • Northamptonshire UK
  • Convertible
  • War Time
  • campervan
  • limousines
  • prototype
  • coupe
  • British Concept Cars
  • Coach-Bus
  • British Sports cars
  • Steam Cars
  • British Commercial vehicles
  • Driving techniques
  • vehicle body parts
  • Service related
  • Vehicle Paint
  • vehicle body repair
  • Technical terms
  • welding

Please help to keep this site active.

Enjoy all of Motor Car Here


Back to Top

© 2025 Motor Car History