Car Drum Brake Adjustment
Car Drum Brake Adjuster Location
Some Cars Are Fitted with drum Brakes on the rear a few classic cars have drum brakes all round. Drum Brakes contain brake Shoes lined with high friction material When they are applied the brake shoes are pushed against the inside of the metal drum attached to the wheel The friction the friction between the shoes and the drum brakes makes it hard for the wheel to turn and so slows the car down. When the linings of drum brake shoes wear away, the shoes must be adjusted to move nearer to the brake drum, or else the brake pedal will have to be pushed further and further to make the brakes work.
Car Drum Brake Adjuster location Front
Some brake shoes adjust themselves automatically for wear but other types need to be adjusted by hand. You should check the adjustment of your brake shoes, particularly if braking performance is poor. Your car's manual will tell you whether your car has automatic or manual adjusters.
Car Drum Brake Rear Adjuster Spanner
Press the brake pedal firmly a few times to make sure the mechanisms are fully released, and then Jack up the car and chock the wheels With a triangular shaped Piece of wood at the back There is no need to remove the road wheel to adjust the brakes If you are adjusting the rear brakes of the car, release the handbrake before you start work Support the car on axle stands so that you can work under the car In safety Most adjusters are found on the outside face of the brake backplate pointing outwards under the car. The brake backplate usually gets covered with dirt, so clean It with a stiff brush.
Car Brake Adjustment Free Tight Adjuster
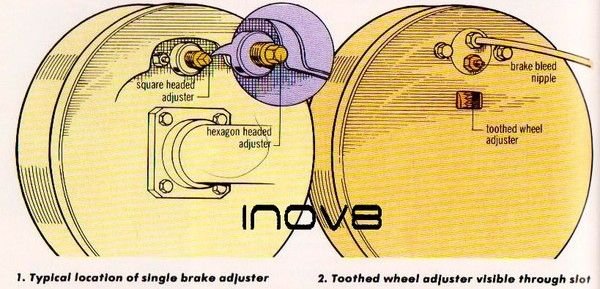
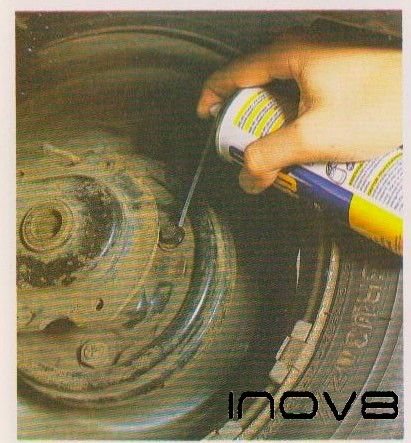
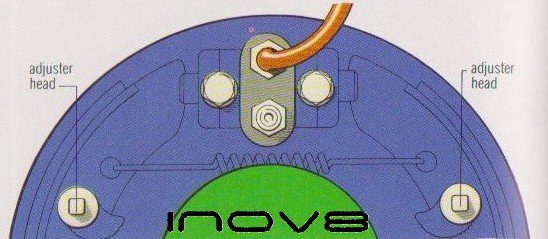
You should now be able to see' the brake adjuster, there are usually two adjusters fitted to a front brake though a single one is normal on the back. Be careful not to confuse a brake adjuster with a brake bleed nipple. You will be able to distinguish the bleed nipple by its nozzle like tip with a hole in the end which slicks out beyond the head of its locking nut. Brake adjusters can be difficult to turn because of their exposed position they are prone to seizing in place. So, a squirt a little penetrating oil around the base of the adjuster before starting work to help loosen them.
Car Drums Check For Movement To Adjust
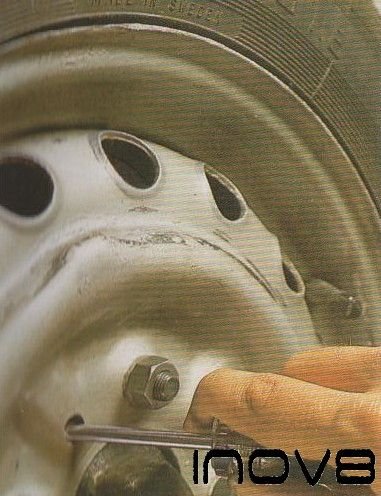
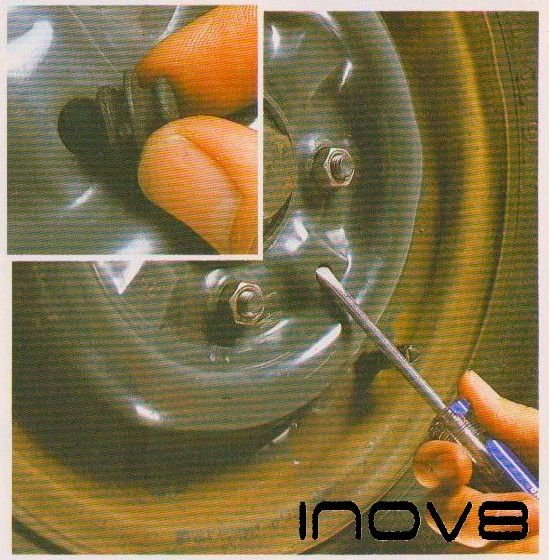
if you discover that the adjuster has a square or small hexagonal shaped head you will need to buy an adjusting tool for your car. This is an available at most accessory shops. Do not try to substitute an ordinary spanner which is a slack fit. The force you may need to exert will round of the head flats and may make adjustment and removal difficult. If no screw head is visible, look for a rubber plug in the backplane you find one your car is fitted with toothed wheel type of adjuster. lever the plug out with a screw driver and put your finger in the hole you should be able to feel the toothed Wheel inside. if no adjuster nor screw head is visible, look on the front of the wheel near the wheel nuts. You may have to remove the wheel trim as described in your hand book. Look for a hole that goes through the wheel and drum If you find one look closely and tum the wheel slowly in one or two positions. depending whether one or two adjusters are fitted, you will see a slotted screw line up with the hole. This is the adjuster head You may need to shine a torch into. The hole to see the adjuster head through the wheel and drum.
Car Drum Remove Bung To reveal Adjuster location
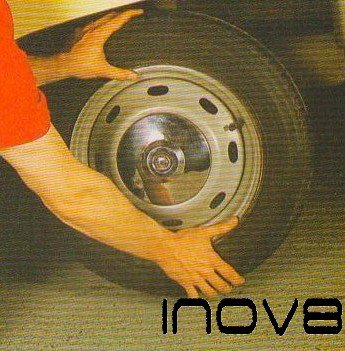
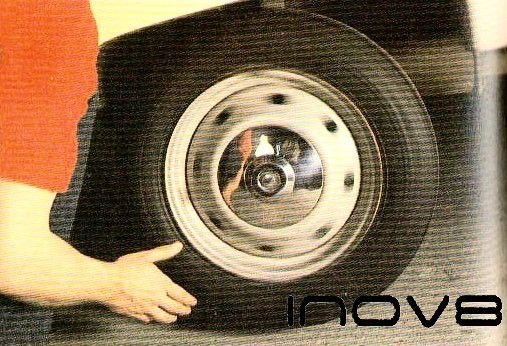
Check that the Jacked-up Road wheel turns by hand There will be a little resistance to turning on the driven wheels, for example the rear wheels of a rear-wheel-drive car, but you should be able to turn the wheel smoothly and without much effort. If the wheel is stiff or if the wheel turns in a series of Jerks, the brake shoes may be rubbing against the brake drum. In this case you need to adjust the brake shoes away from the brake drum so that the wheel can turn freely. If one brake is rubbing you may have noticed that the car pulls to one side when you use the brakes or that one wheel gets hot.
Car Twin drum Adjusters
Step 3 screw head adjusters
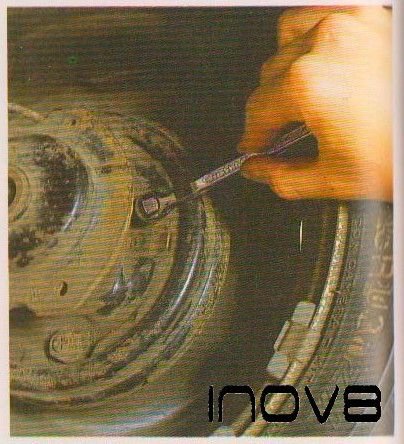
The technique for adjusting screw head adjusters and those with square and hexagon heads is basically the same. Use the screwdriver, brake adjustment tool or spanner to turn the adjuster until you feel it suddenly get harder to turn If you have to turn the adjuster more than about half a turn you are probably turning it the wrong way causing the shoes. to move away from the drum instead of closer. When the adjuster gets difficult to turn, try to turn the wheel The wheel should be locked Turn the adjuster in the opposite direction until you can turn the wheel without it rubbing against the brake shoes. Make a note of how many turns or clicks the adjuster is backed off from the drum, if there are two adjusters on the same wheel leave the other at this stage If there are only one brake adjuster this brake is now properly adjusted and it is time to go round to the opposite wheel
Check For Free Play Car brake Adjust
Alternative Step 3 toothed wheel adjuster
To adjust a toothed wheel adjuster, remove the plug (see step 1) use a screwdriver to turn the adjuster. Rest the blade of the screwdriver on the edge of the hole in the wheel or backplate use the screwdriver as a lever.
Turn the toothed wheel until you feel that it gets harder to turn if you have turned the adjuster more than a couple of turns and it does not get harder you are probably going in the wrong direction when you can feel that the toothed wheel is difficult to turn, check that the wheel is locked by trying to turn the tyre. Then back of the adjuster by tuning the toothed wheel the other way until the tyre turns freely. Make a note of how much you back of the adjuster from the drum, if there are two adjusters on the same wheel leave the other one at this stage. If there is only one brake adjuster it is now time to go on the opposite wheel.

Typical Car Drum adjuster location
When you have adjusted one brake. you must make sure the brakes are balanced This means making sure that you make an even amount of adjustment on each of your drum brakes. so that one does not grip the drum before the other and cause the car to pull to one side This is done by backing off the adjusters on the remaining brakes by exactly the same amount as the first one.
If there are two adjusters on the same wheel. now is the time to adjust the second one then move on to the other brakes. Adjust these in the same way as the first When you have adjusted all the brakes it is worth making a final check before removing the axle stands Press the brake pedal firmly a couple of times to settle the shoes in the drum Now check that the adjustment is still correct by repeating the procedure turn the adjuster until the wheel locks and then slacken it until the wheel can turn freely, again noting that you turn back all the adjusters the same number of turns. When you have finished adjusting the brakes, take the car out on to the road to check your work. If the brakes are properly adjusted, they should pull the car up in a straight line, find a reasonably straight stretch of road that is free of traffic.
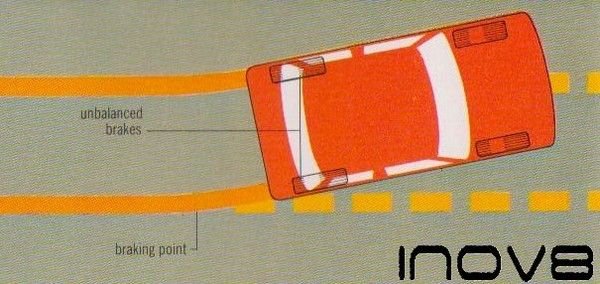
Make sure that the road is level or else the car may try to run down the camber away from the centre of the road. Drive the car at about 20 mph (30 kph) and gently relax you grip on the steering wheel until you are just using light finger pressure to guide the car, you will now be able to tell whether the car runs straight or whether it tends to pull to one side. This will tell you if one of your brakes is binding. If the car runs straight, apply the footbrake, gently at first. and see whether the car pulls to one side If the car stops in a straight line, the brakes are correctly adjusted. If the brakes are not properly balanced and the shoes on one brake are making contact with the brake drum slightly before the other brake takes effect, the car will try to pull to one side when you put on the brakes If the car tends to pull to the left when you use the brakes, It could mean that the brake shoes on the right side of the car are too far away from the drum so that the brake on the left side does more than its fair share of the braking, If you find that this is the case. you may need to tighten the adjustment on the right brake. Alternatively, the problem may be due to the left side brake coming on early.
Carefully check brakes for pulling after adjustment
