Finding Engine Coolant Leaks
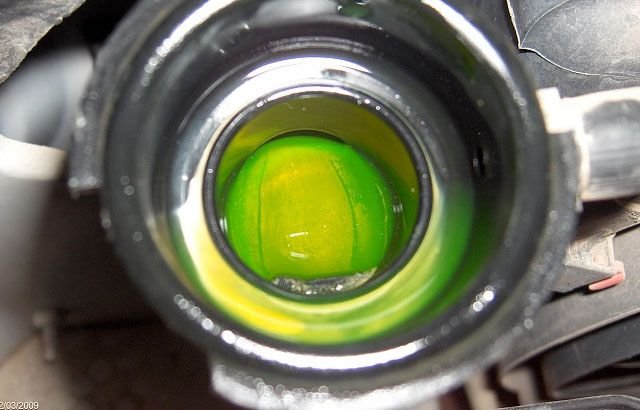
Engine Coolant Level is Low
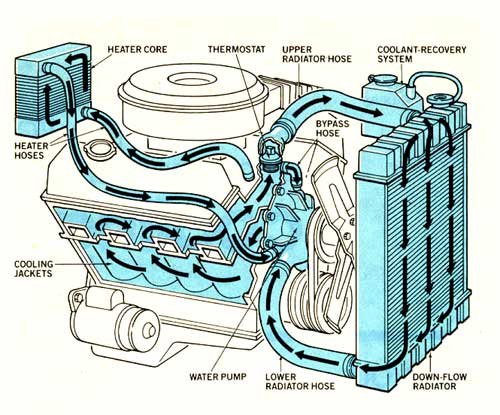
Many points in your car’s cooling system are liable to develop leaks through which coolant can escape. To inspect for a leak in your car’s cooling system, you should understand that the main physical components involved in the cooling system are: engine block, radiator, thermostat, upper and lower hoses, radiator cap, radiator fan, water pump and, heater with hoses. A leak in the heater core most often results in escaped coolant on the front passenger-side floor of the passenger cabin. Most automobile antifreezes are either green or red and despite a sweet smell they are very toxic. Particular care must be taken to dispose of old coolant properly, as the sweet smell can attract children and pets, and disposing of old coolant at random contaminates the environment.
The best repair for a leaking heater core is to replace the core. Visible signs of leakage are the most obvious indicator of heater leaks, but you should also physically inspect the heater core for signs of deterioration. When checking the heater hoses squeeze one hose at a time, you should feel that the hose is soft and flexible. There should not be any irregular bulges in the hoses and you should not feel any dry rot, which manifests as brittleness and/or cracking. You should not feel any weak spots in the hoses. If you detect any of these conditions, replace the heater hoses. When replacing hoses measure the length and diameter of your old heating hoses so you will know the size of the new ones. Most cars use two different sizes of heater hoses; the standard diameters are 1/2”, 5/8”, and 3/4”.
When removing the old hoses, take care not to use any yanking or turning motion that could damage the heater core. Mechanics often score the old hoses open with a knife and then gradually coax them loose before removing them. Engine coolant is used to transfer heat from the engine to the radiator by the cooling system. The radiator removes heat from the coolant by forcing air through the radiator fins. Without coolant, your engine will overheat and if left unattended severe engine damage will occur. Coolant colours can vary from green, orange, blue and yellow each having their own protective properties. Coolant leaks are common car problems; we have listed some of the most common causes below.
Troubleshooting
Inspect the Coolant Level in the Coolant Reservoir Tank -Coolant level should be between the hot and cold marks. If the reservoir is empty the cooling system may have a leak. Always check the coolant level when the vehicle is cold, preferably overnight. Use caution when checking coolant level, always check the coolant level when the engine is cold. Preferably letting the engine cold down overnight.
Radiator Cap
Step 1 - Checking the Water Pump - The water pump is used on the engine to circulate coolant from the engine to the radiator. The water pump is powered by the engine using a serpentine belt or in some cases the engines timing belt. The main shaft in the water pump is used the support the drive pulley and the impeller. This pump shaft is supported by two bearings and sealed by a shaft seal. If the seal or bearings fail it causes coolant to leak from the inspection port in the water pump. The water pump must be removed and replace with a new unit. Replacement instruction varies from car to car for exact instruction consult an auto repair manual.
Step 2 - Check for Radiator Leaks - The radiator is used to remove the heat created by the engine from the coolant. Air is forced through radiator cooling fins either by car motion or by the cooling fan. This cooling fan can either be driven by the engine or an electric motor. Radiators are made from an aluminium core and two plastic tanks on either side. As a radiator ages the plastic tank will crack causing coolant to leak. To inspect for this condition, use a flashlight to locate the radiator tanks. Inspect these tanks and the seal between the tank and the radiator core. If leakage is observed remove car radiator to replace with a new unit, refill with coolant and recheck the system.
Step 3 - Inspect Coolant Hoses - Rubber hoses are used to transfer coolant from one part of the engine to an accessory like a heater core or the radiator. To inspect hoses for leakage, start with the engine cold, check hoses for cracks, bulging or oil contamination. If a hose is discovered that exhibits any of these conditions replace the hose with a new unit. When repairs have been completed refill the cooling system and recheck. A cooling system service or flush will keep your vehicle’s cooling system from becoming acidic. This condition occurs when chemicals in the coolant break down creating acid. This acid is very corrosive and will destroy cooling system components. Flush regularly and replace thermostat and refill system with manufacturers recommend coolant/anti-freeze.
Coolant System
Best Practices:
To avoid this problem simply change your coolant often. If you change the engine coolant every 40,000 miles and you should be ok. All engine coolants must be replaced on a normal schedule to avoid the coolant changing its chemical base composition to an acid. This condition will cause the coolant to eat away at internal engine parts, seals and gaskets, causing premature engine failure and added expense. The coolant mixture to water should be about 60% coolant and 40% water (distilled is recommended). Always add and check coolant level in the coolant reservoir when the vehicle is cold. Be careful of harsh chemical flushes because they can cause more damage than good, especially to aluminium heads, intake manifolds, and the engine block, read the warning carefully on the label.
