How to do a Car Spark Plug Service
Removal, Inspection and Refit
Spark plugs are among the most vital parts of the ignition system. Their condition and adjustment affect both performance and economy. Although they look simple in construction they are designed tuned to work in direct contact with the extreme temperatures and pressures inside the engine's combustion chambers
The constant passage of high voltage electrical energy across the gap between the two electrodes gradually erodes away the metal and so the gap enlarges. So, you should clean the plugs and adjust the gaps every 5,000miles (8,000km). Standard spark plugs must be changed every 10,000 miles though the new, platinum cored types have a longer life.

1. Car plug socket types For Maintainance
You must have a plug spanner to unscrew the spark plugs from the cylinder head Most plugs need a 14 mm spanner but a few cars. such as some Vauxhalls and Peugeots. need a 10 mm plug spanner check what size you have before buying a plug spanner. Most car makers Include one in the toot kit but special plug spanners can be bought (fig 1) the best ones have a rubber Insert to gap and protect the ceramic plug body on some cars access to one spark plug is extremely difficult because one end of the engine is hidden under a bulkhead or some other components. To reach this plug you Will need a plug spanner made specifically for your own car. unless you have a comprehensive socket set These include plug sockets, a universal joint and an extension bar, which should allow you to cope with anything. You can buy a combined set of feeler gauges with a gapping cheaply from most accessory shops (fig 2).
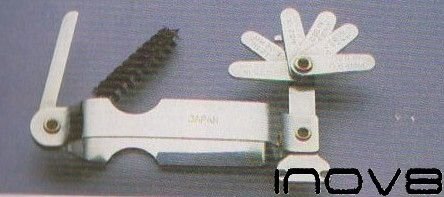
2. Car Plug Feeler Gauge and Adjuster tool
You may have a set of long feeler gauges but these do not have a lever notch for adjusting the plug gap Each feeler gauge has its thickness marked on the top. Maybe necessary, use two of the gauges together to make up the thickness specified, if your feeler gauges do not have a gapping tool included, a small screwdriver will do the Job instead. A long-bustled paint brush is also useful to clean away loose dirt around the plug seat.
Before pulling off the plug connector caps, label each plug's high-tension lead with its cylinder number so that it can be replaced correctly. Then pull off the plug caps always pull the cap itself, not the plug leads. Push the plug spanner firmly on to the first plug and unscrew it about four turns Use the paint Brush to clean out any. dirt or flakes of corrosion from around the plug hole to prevent them from falling inside the cylinder when toe plug is out. Some cars have a particularly deep plug recess where a brush will not go - either blow out the dirt or use a vacuum cleaner to remove it. Unscrew the plug completely and repeat
The procedure for all the other plugs bearing mind that if the engine is still hot, the plugs will be too. Do not use too much force if you have a stubborn spark plug. an extension steel handle of the plug spanner to get more leverage. If this does not work, take the car to a service garage which will the looks and experience to do the Job. Garages can repair damaged plug hole with a spring like steel insert essential if the plug has been cross threaded into cylinder head. look at the colour and condition of the tip of each spark plug if the engine is well tuned all the plugs should be the same.
 |
 |
| 3. Car plug colour | 4. Car plug worn |
light biscuity brown colour (fig 3). Plugs of a significantly different appearance are a sign of a problem needing further investigation You may have a leak between the inlet manifold and the head or a burnt valve.
Marked rounding of the centre electrode together with pitting of the side electrode (fig 4) means that the plug should be discarded. it is not a good idea to renew just one plug - always fit a whole new set.
Badly blackened spark plugs or those with hard deposits can be cleaned by grit blasting never use a wire brush on the tip of the plug because the bristles can leave conductive tracks of metal across the centre electrode insulator. Some garages will grit blast plugs for a small charge but compare their charge with the cost of new plugs before you go ahead because the slaving may be insignificant. There is also a DIY plug cleaner that works in the same way as the professional machine. You can clean off any soft, dusty deposits with a tooth- brush. A wire brush can be used to remove any dirt from the screw threads of the plug (fig 5). Wipe off any dust or oil on the ceramic insulator body.

5. Clean Car Plug with brush
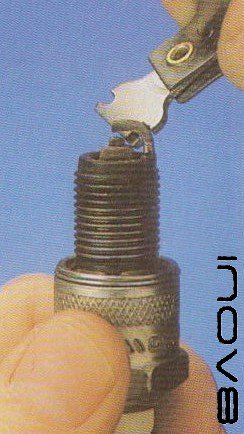
Next, use the contact file to clean the tip of the central electrode and the inside face of the side electrode. If the file will not fit between the electrodes, use the lever notch on the gapping tool to bend back the side electrode slightly File the surfaces of the electrodes until they are clean and flat be careful to keep the file level while you are using it.
Most cars have a plug gap of about 0.025in in (0.6-0.7 mm). but the gap recommended for your car should be given in your manual pick the feeler gauge of the correct thickness and use it to measure the gap between the electrodes the feeler gauge should be a tight sliding fit without any slop at all once it fitted between the electrodes
You can adjust the gap by bending the side electrode (fig 6). If the gap is too narrow. bend back the side electrode with the lever notch on the gapping tool. If the gap is' too wide tap the side electrode with the lever notch on the gapping tool if the gap is to wide tap the side electrode gently with a spanner so that it moves closer to the central electrode. Always check that new spark plugs have the right gap.
6. Car Plug Adjustment
A Light smear of graphite grease on the plug threads (fig 7) will make them easier to screw In and help to prevent them seizing up.
 .
.
7. Car Plug Grease
However, plugs which are too greasy can cause bad running so give the insulators a final wipe before you screw them in (fig 8) Screw the plug into the hole by hand for at least the first four turns so that there can be no of cross-threading.

8. Clean Plug Before Replacing in car
Plugs should never be over-tightened they must-only be screwed down hard enough to make a good gas seal then if the plug has if the plug has a metal compression gasket, screw it down by a further quarter of a turn. if the plug ha a taper seat, screw it down by only one sixteenth of a turn.
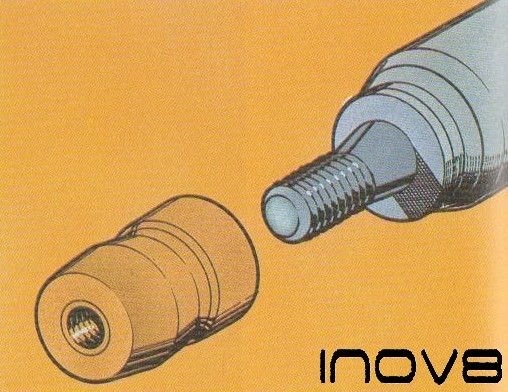
Before you reconnect the plug leads, note the type of terminal connection on the top of the plug, There are two types, Some plug caps push home directly on to the thin screw thread which protrudes from the ceramic insulator while others fit over a much thicker adapter which screws on to the plug terminal (fig 9) Depending on which type of lead connector you have, you may have either to remove or to screw on this collar. Push the plug caps firmly home over the plug-top terminals. Make sure you have the plug leads on the right plug by checking that the labels off the leads are in order. Finally, check your work by running the engine and make sure that it idles smoothly without any of the lumpiness that would suggest that one cylinder is not firing.
9. Car Plug Srew On cap
